As we know, the new Windows 11 bring some fresh and new design with a completely visually changed interface. That’s why some users may get confused when it comes to enabling this type of feature. So, we are here to reduce your work. Therefore, now, I’m not going to waste your time talking here and directly bring you towards the steps that will help you enable the Virtualization (hyper-v) in Windows 11.
What is Microsoft Hyper-V?
For those who don’t know about the Hyper-V, then it is a virtualization platform of Microsoft Windows, and it comes natively with windows 11. But, you require to enable this feature manually because, by default, it is disabled on your PC. However, unfortunately, if you have the Windows 11 home version installed on your PC, then you may not be able to use it as it comes on Windows 11 Pro and Windows 11 Education.
What is Microsoft Hyper-V?Steps To Check Whether Your PC Supports Hyper-V or NotMethod 1: Using Task ManagerMethod 2: Use Command PromptSteps To Enable Virtualization in Windows 11How To Open The Hyper-V Manager on Your Windows 11 PCFrom Author’s Desk
Meanwhile, if you don’t know how to check the Windows 11 version, follow the given link. The main purpose of Hyper-V is to let you run virtual machines on your Windows 11 PC. Talking about the virtual machine, then it is an application that allows you to run numerous operating systems using the same physical hardware in a solitary and protected place. Also Read- How to Start Windows 11 in Safe Mode
Steps To Check Whether Your PC Supports Hyper-V or Not
There are two methods that you can use to know if your PC has the support for Virtualization. So, let’s take a look at them:
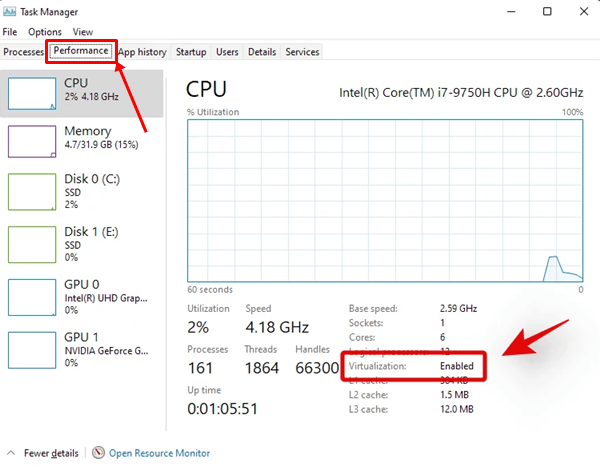
Method 1: Using Task Manager
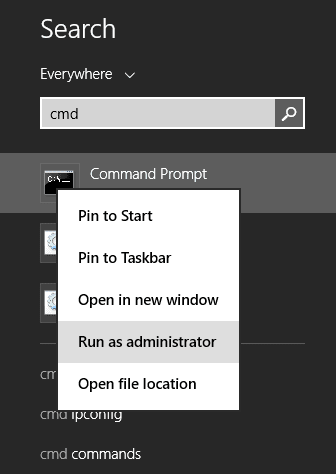
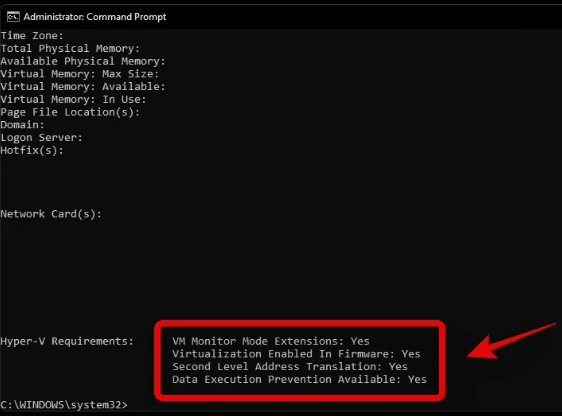
Method 2: Use Command Prompt
Steps To Enable Virtualization in Windows 11
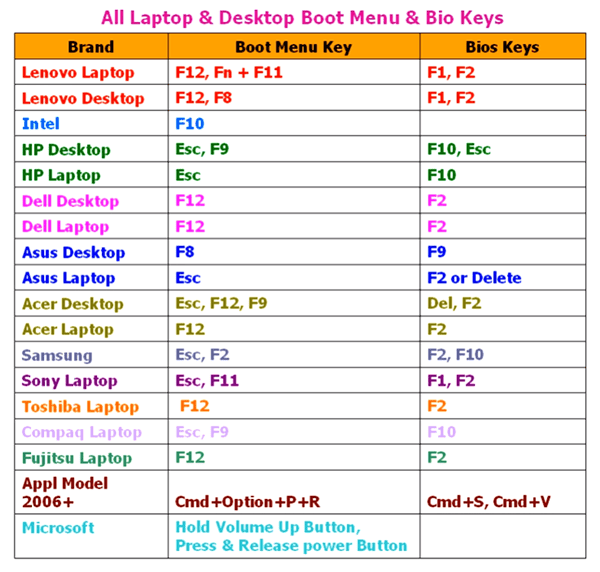
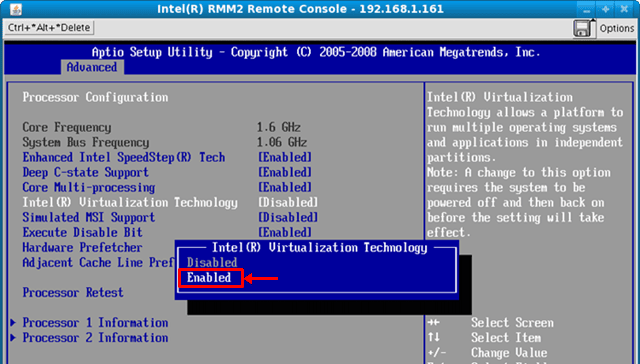
So, now you know how to check if your PC supports Virtualization or not. Therefore, now it’s time to enable it. But, before we start with it, you need to check if this is enabled on your BIOS/UEFI settings menu or not. To do so, here are the steps that you can follow the path: NOTE: Every laptop or Computer brand has different keys to open bios settings, so you press the boot key as per your laptop or computer brand and get into the BIOS/UEFI settings. Reboot PC > Press F2 or F10 function key > System Configuration, or Virtual Technology, or something similar settings and enable it. So, now you’ve enabled this option on your BIOS/UEFI settings menu; therefore, let’s take a look at steps to enable the Virtualization in Windows 11.
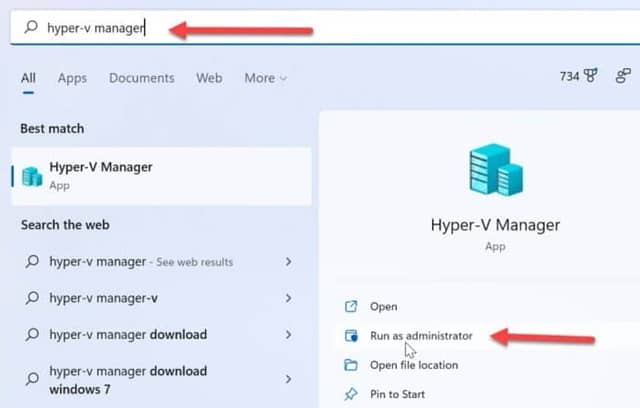
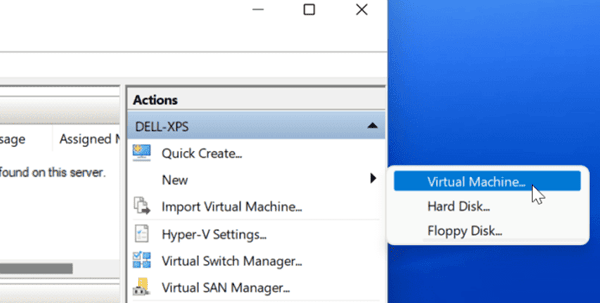
How To Open The Hyper-V Manager on Your Windows 11 PC
Now, as you have followed the above steps; therefore, once the PC gets rebooted, you are now able to create and manage your Hyper-V machines. So, now let’s take a look at how you can use this feature:
From Author’s Desk
So, that’s all we have for you on how to enable Virtualization (hyper-v) in Windows 11. We hope that this guide has helped you. However, in case you have any doubts regarding the Hyper-V feature or find it challenging to enable this feature, please let us know in the comment section.